- Zigaform has a menu bar on top and you can navigate for all the options.

- As you can see, it includes the next menu options:
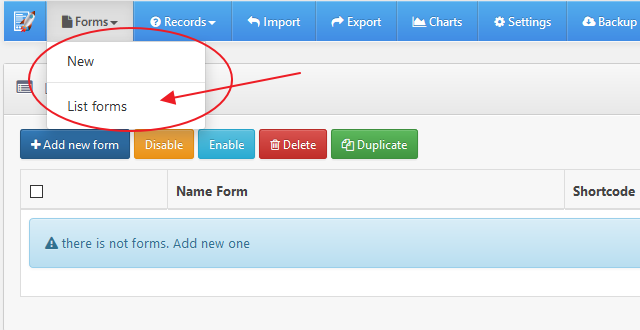
- Forms: this menu options offer the next option: create new form and list created forms
- when you create a new form or edit a form. you will see at the top, tab options: form editor, Email settings, On submission, and main settings.
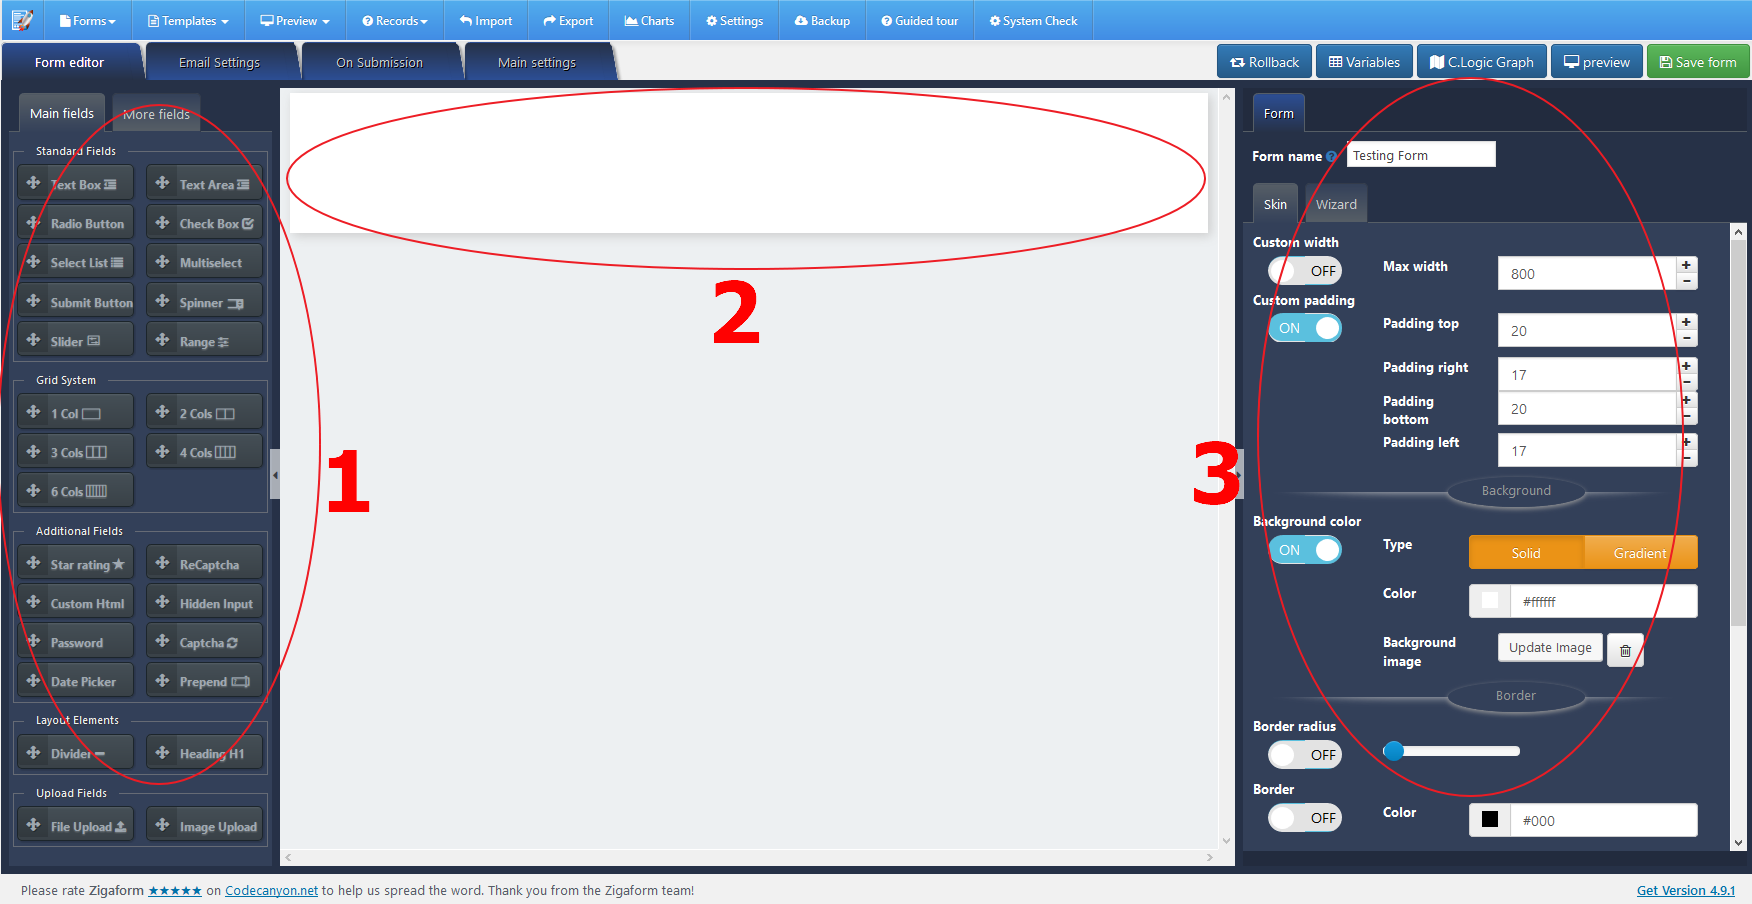
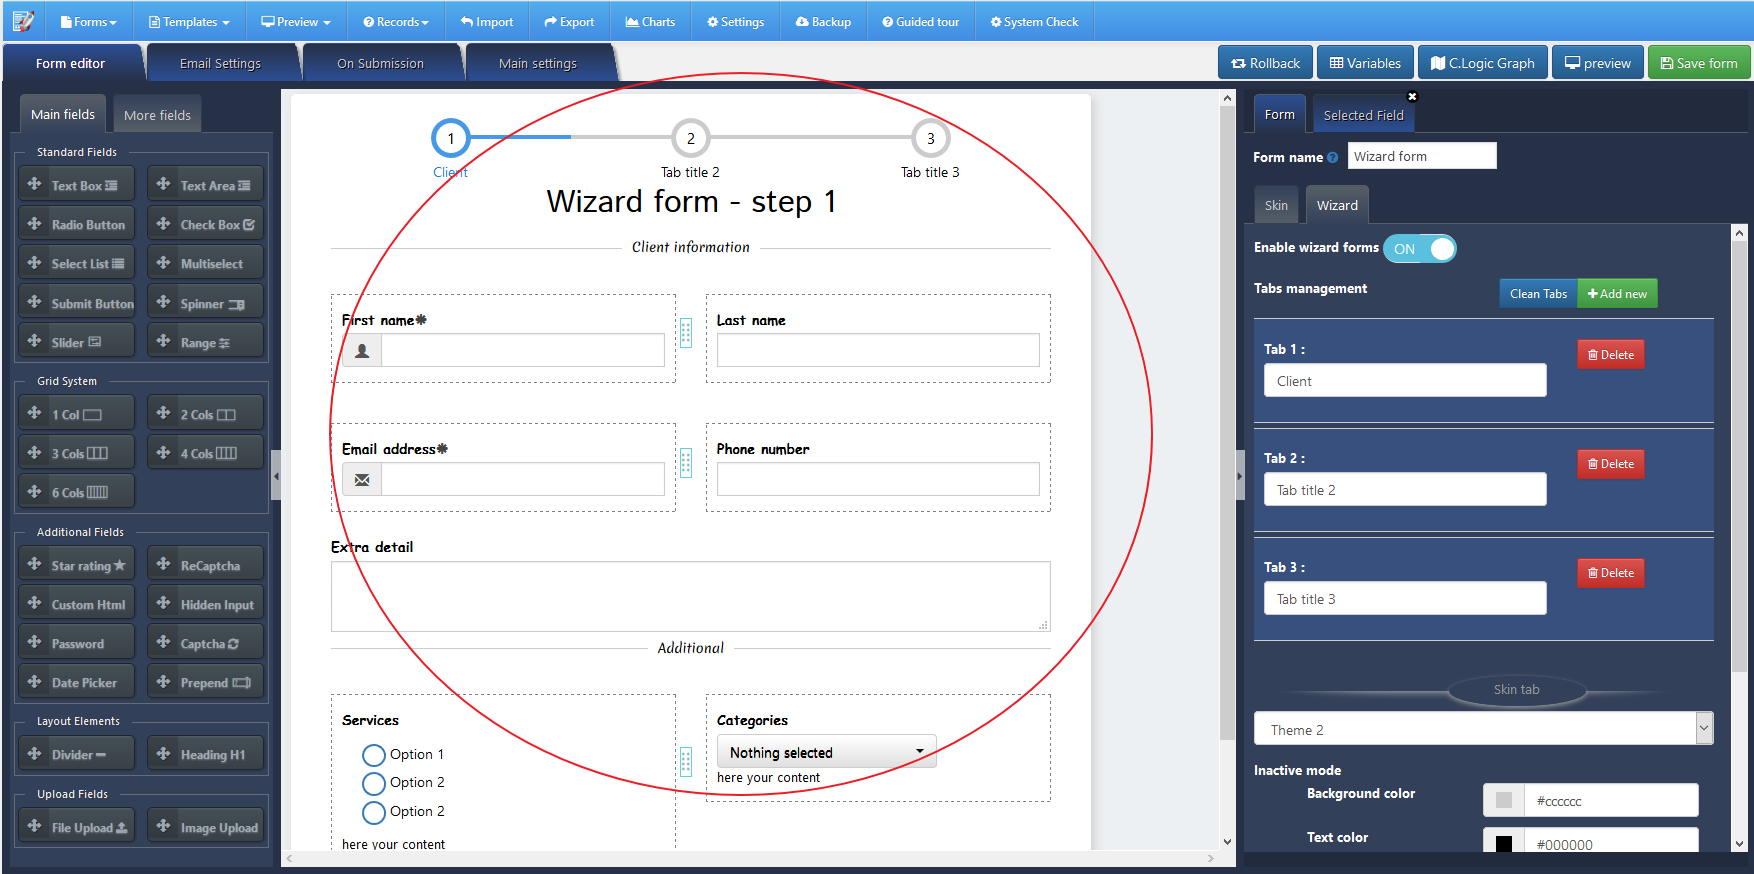
- Form editor: Under “Form editor” tab, the editing panel will be shown: this brings three zones. 1) form elements to add. 2) preview form and 3) form setting tab and form element setting tab
- In first zone, Forms elements (fields) will be shown. I will describe them in detail in the next topics.
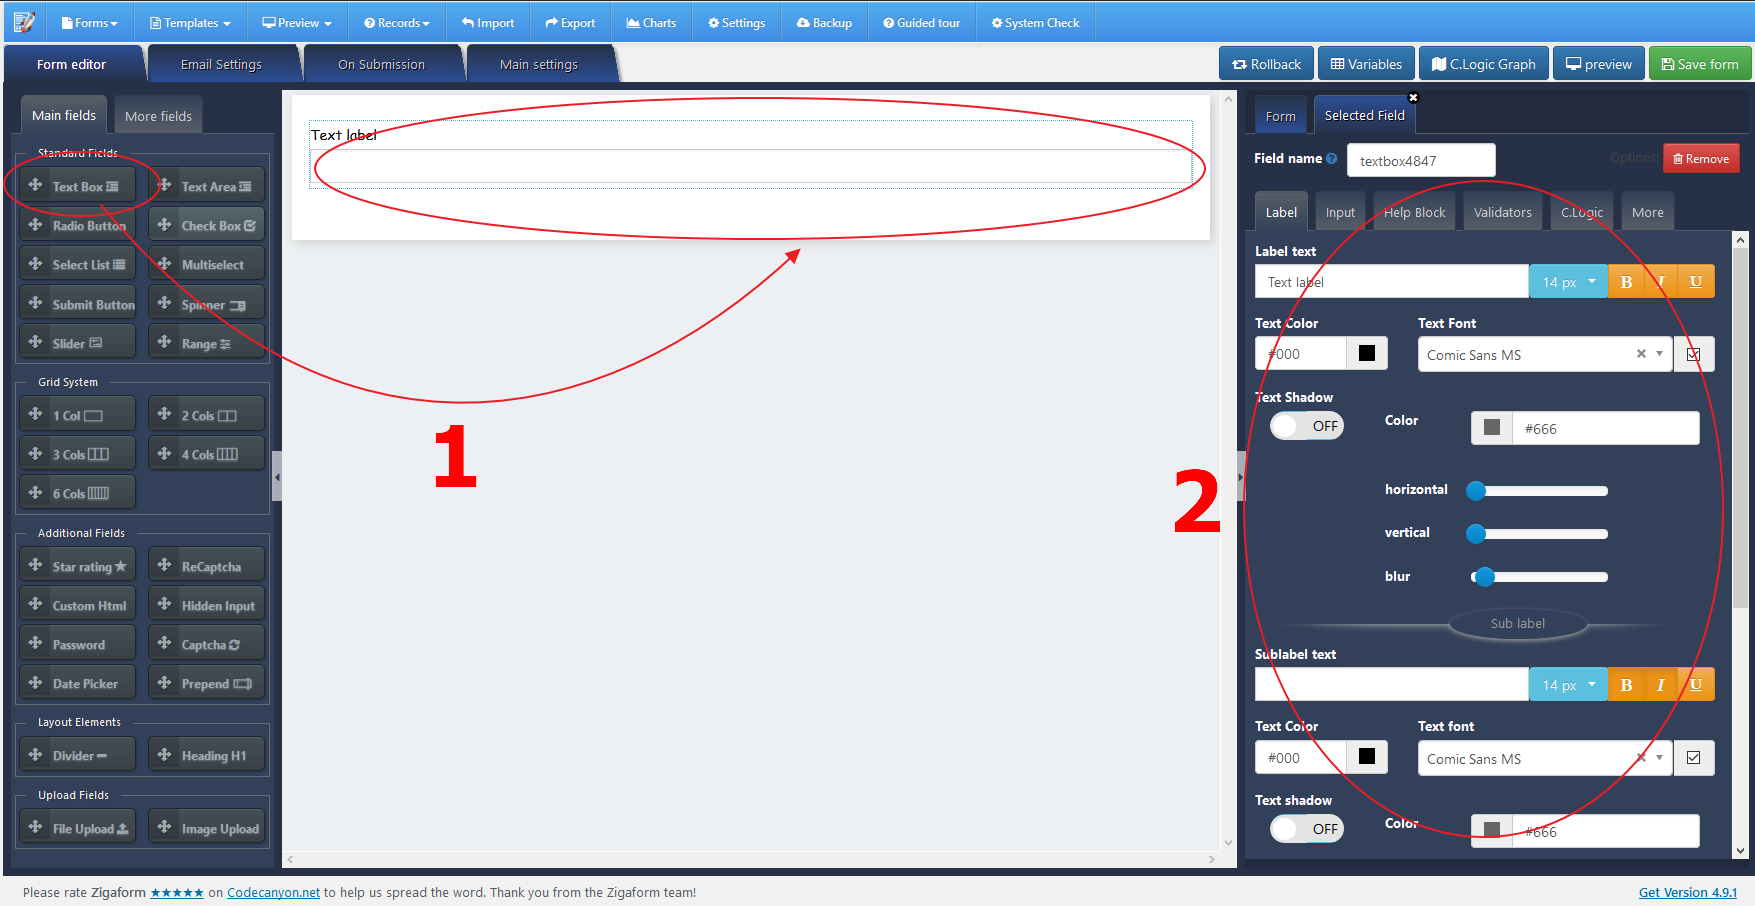
when every time you add a new form element to preview form zone, a selected field tab will be shown on the right: - The new tab on the right include options related to the selected field
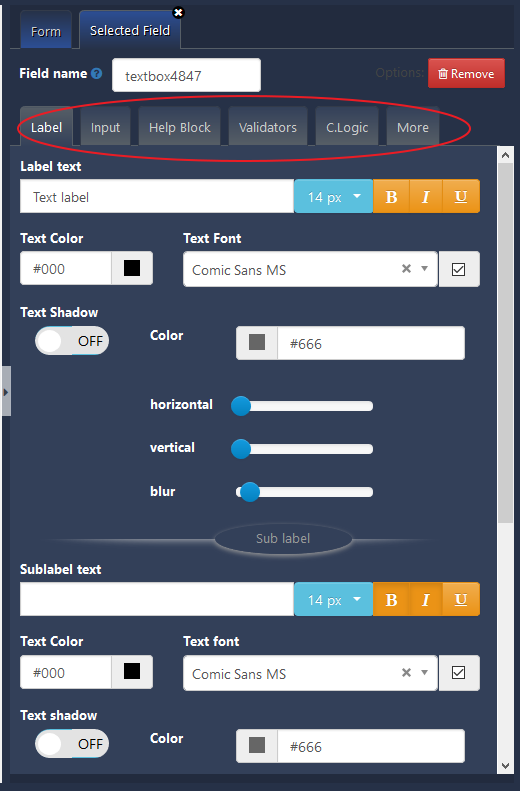
- The options under “selected field” tab are:
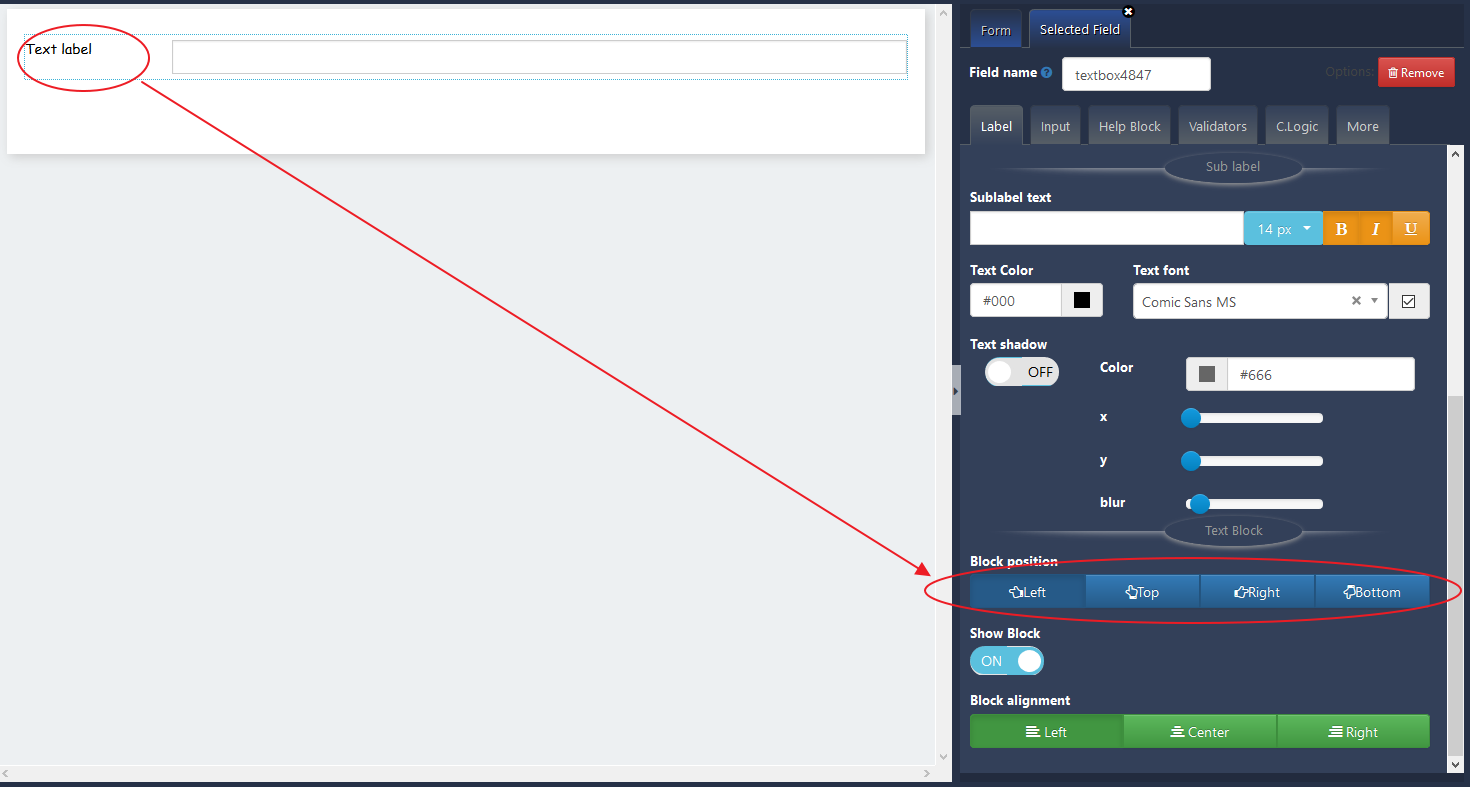
- Label : this tab contains all options to customize the label and sublabel which are next to the input of the field. you can change font, color, size, position, and so on
- Input : this tab contains all options to customize the input depending of which is selected. e.g. change color, background, set input value, set private and public key for recatpcha field, and so on
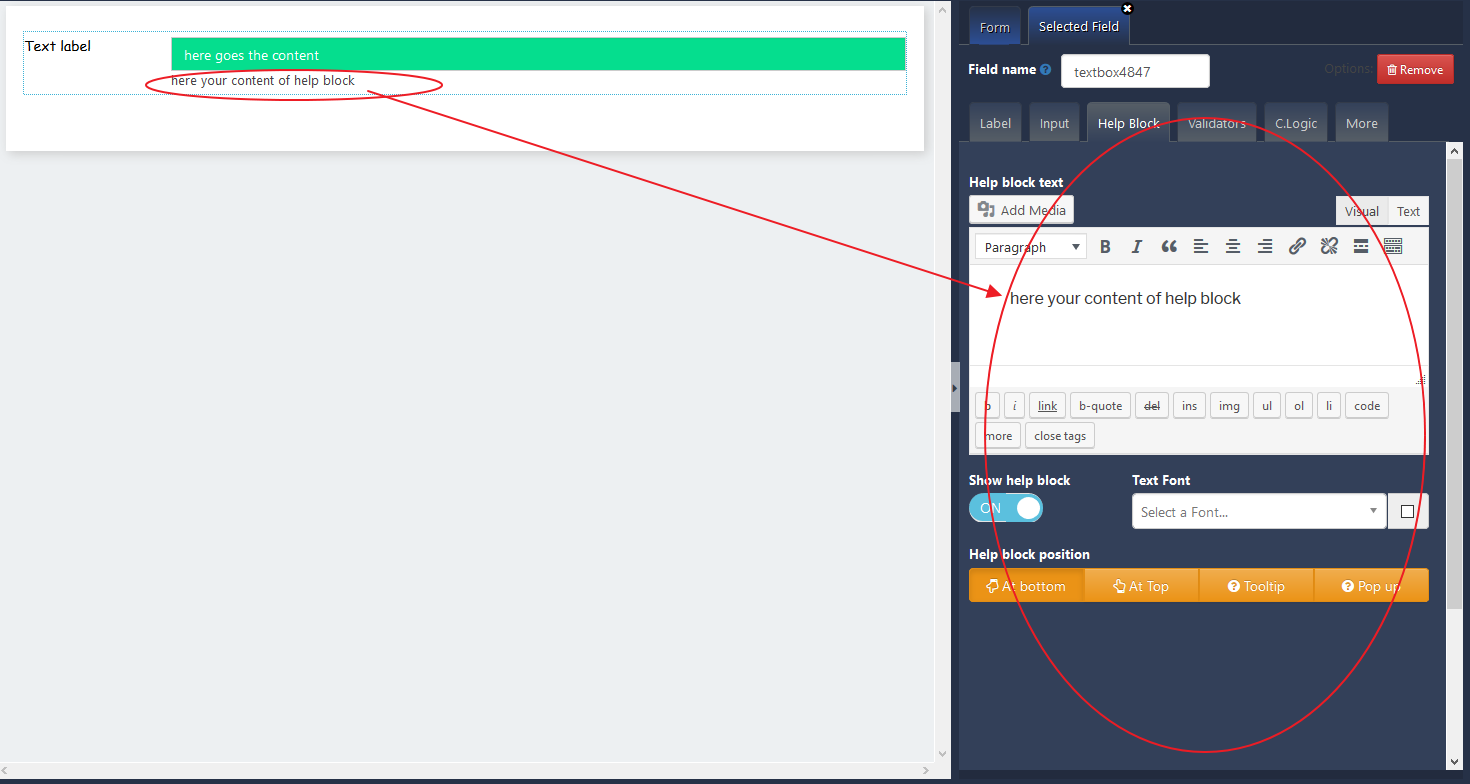
- Help block : this tab contains all options to customize the help block section which are located below input field. check print screen below
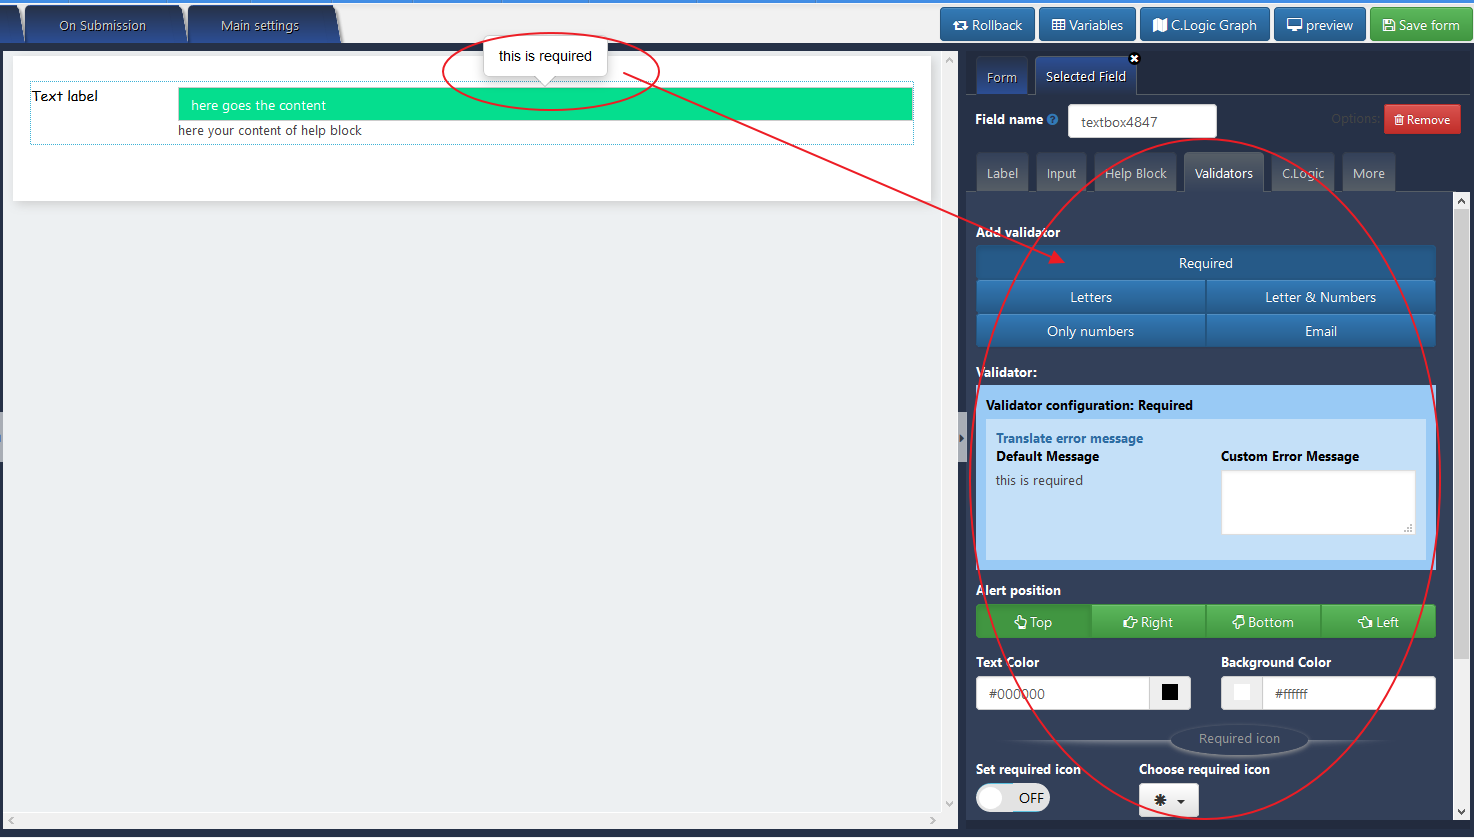
- Validation tab : this tab contains all options to add validation feature to your form elements. it brings a lof of options. e.g. change color of validation tooltip, custom text and so on
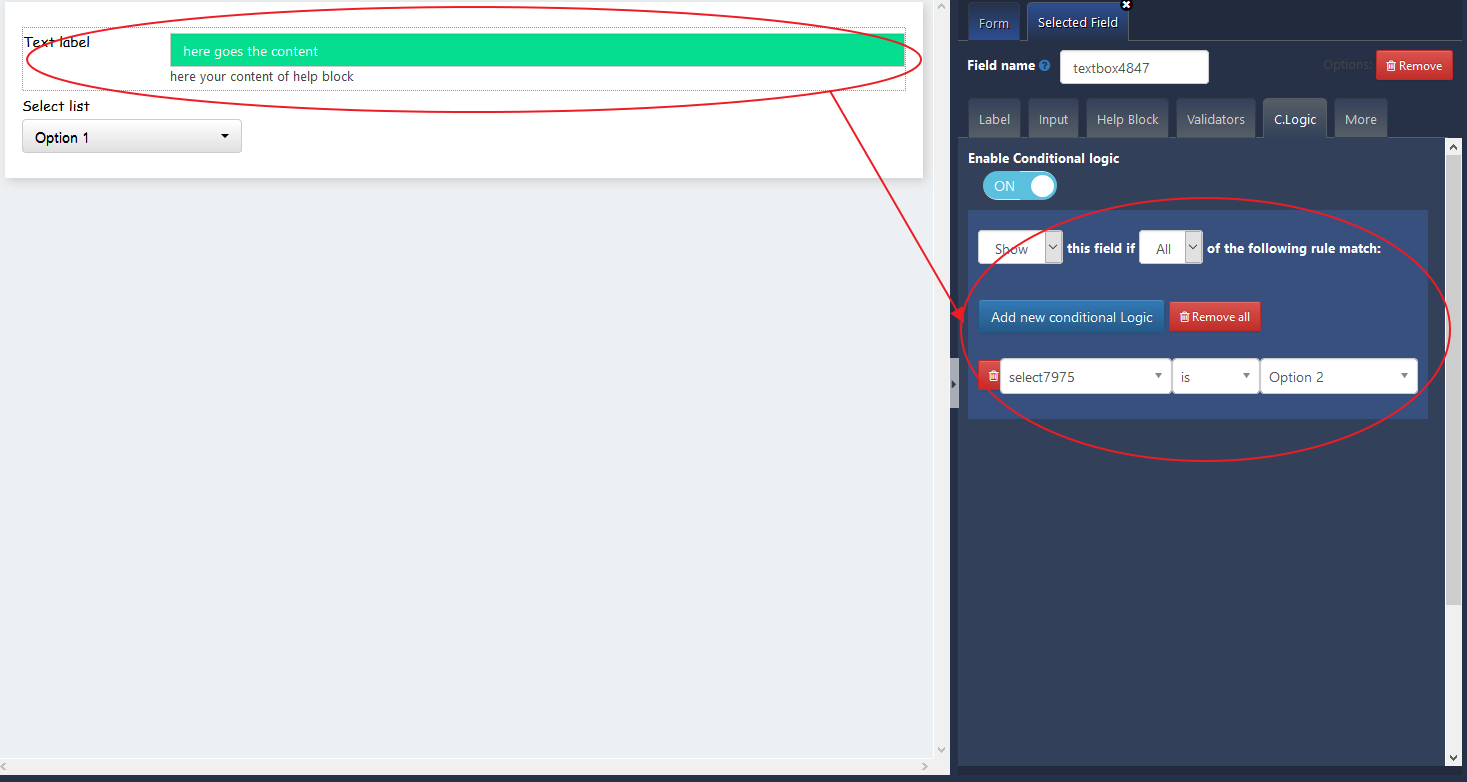
- Conditional logic tab : this tab contains all options to add conditional logic to your form elements. when a new conditional rule is added. all the form elements with options are loaded. this is listed by field name. you can customize the field names in order to recognize your custom fields.
- Label : this tab contains all options to customize the label and sublabel which are next to the input of the field. you can change font, color, size, position, and so on
- On the center, you can find the preview form. every time you make a change on the right panel, this is reflected on this preview form
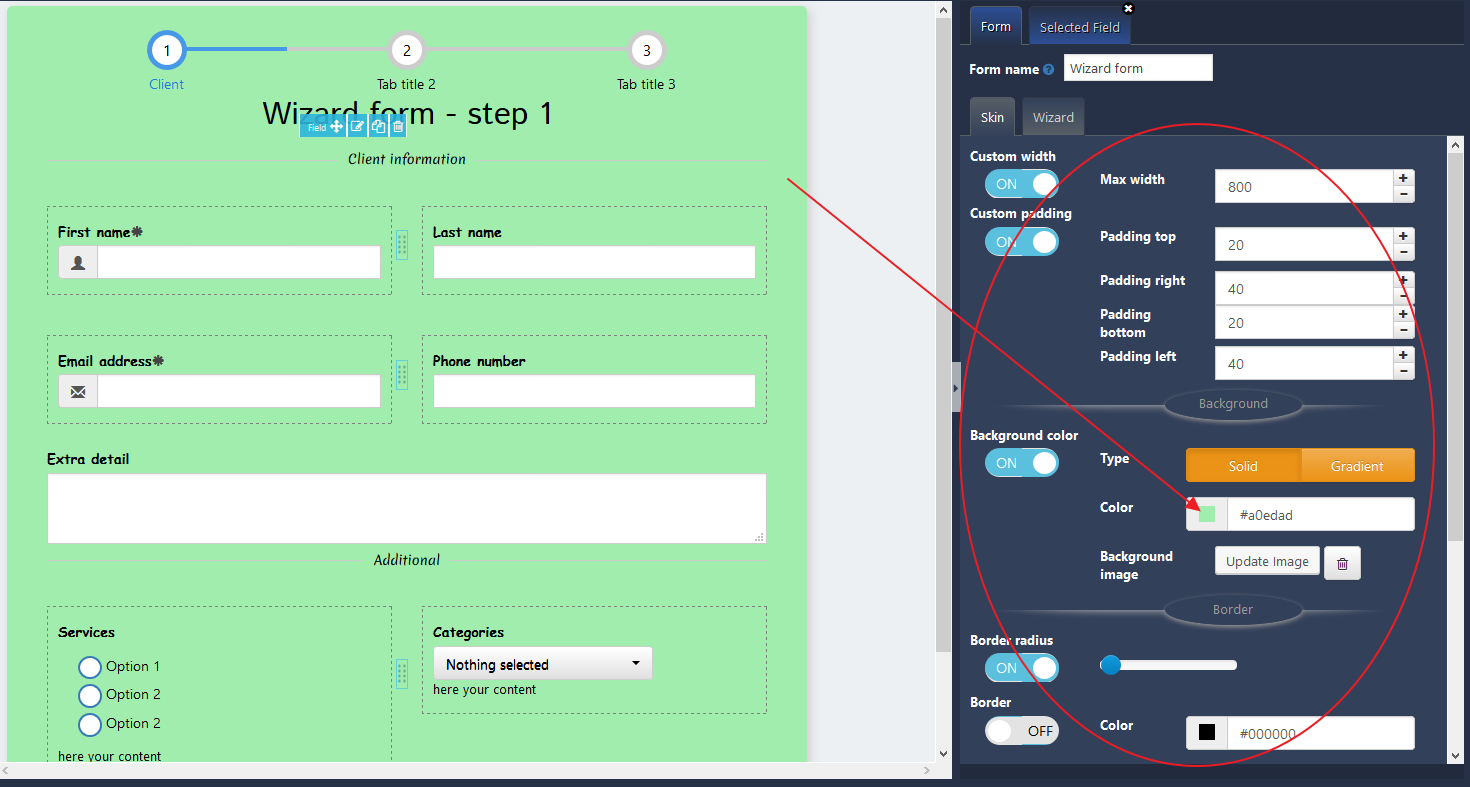
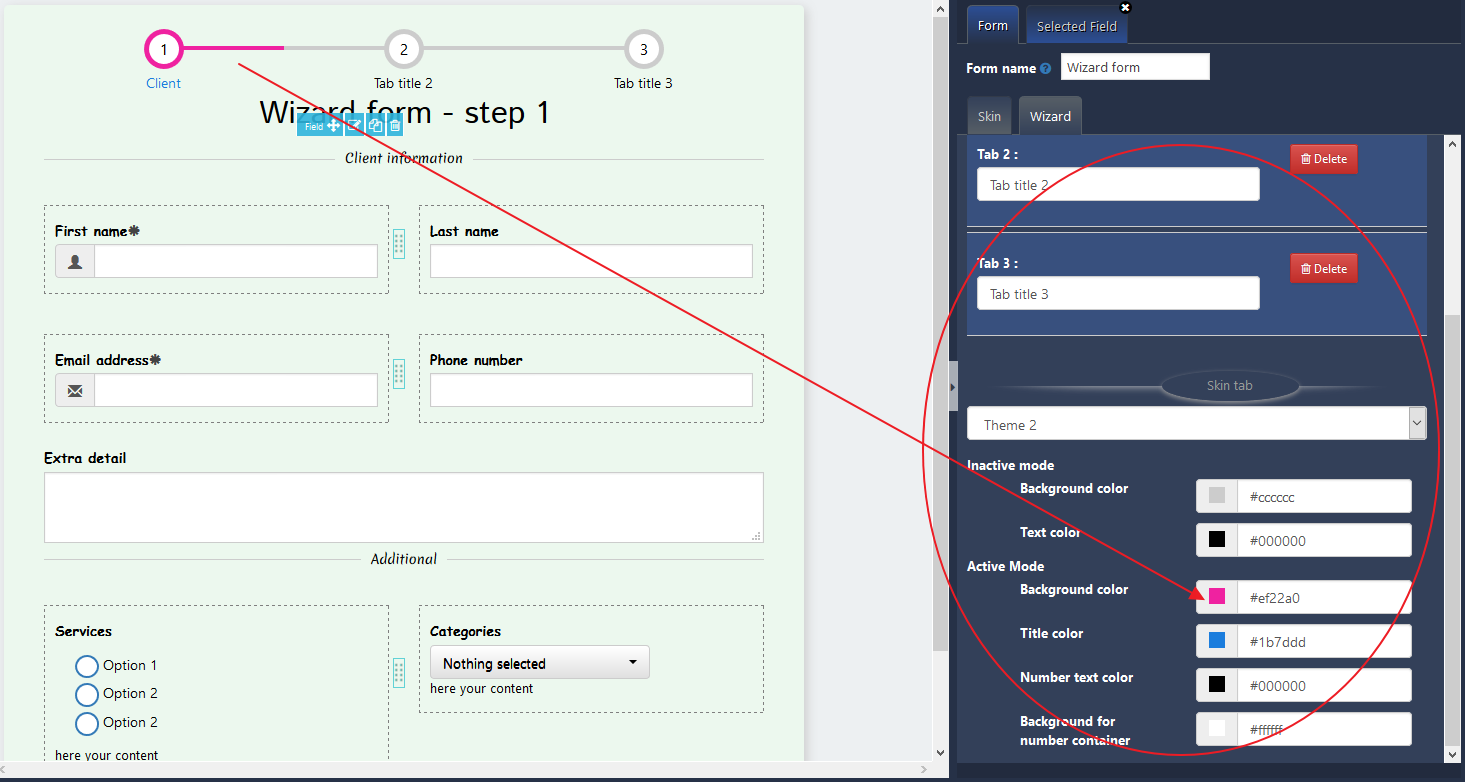
- On the right, Under form tab: you can find all options to custmize the form skin and all related to form itself: the form tab is always shown and it brings the next options:
- Skin tab: on this tab you can find all options in order to change the skin of the form.
- wizard tab: on this tab you can find all options in order to add and customize your wizard forms. you can add many forms to the wizard form and so much more.
- Skin tab: on this tab you can find all options in order to change the skin of the form.
- In first zone, Forms elements (fields) will be shown. I will describe them in detail in the next topics.
- Form editor: Under “Form editor” tab, the editing panel will be shown: this brings three zones. 1) form elements to add. 2) preview form and 3) form setting tab and form element setting tab
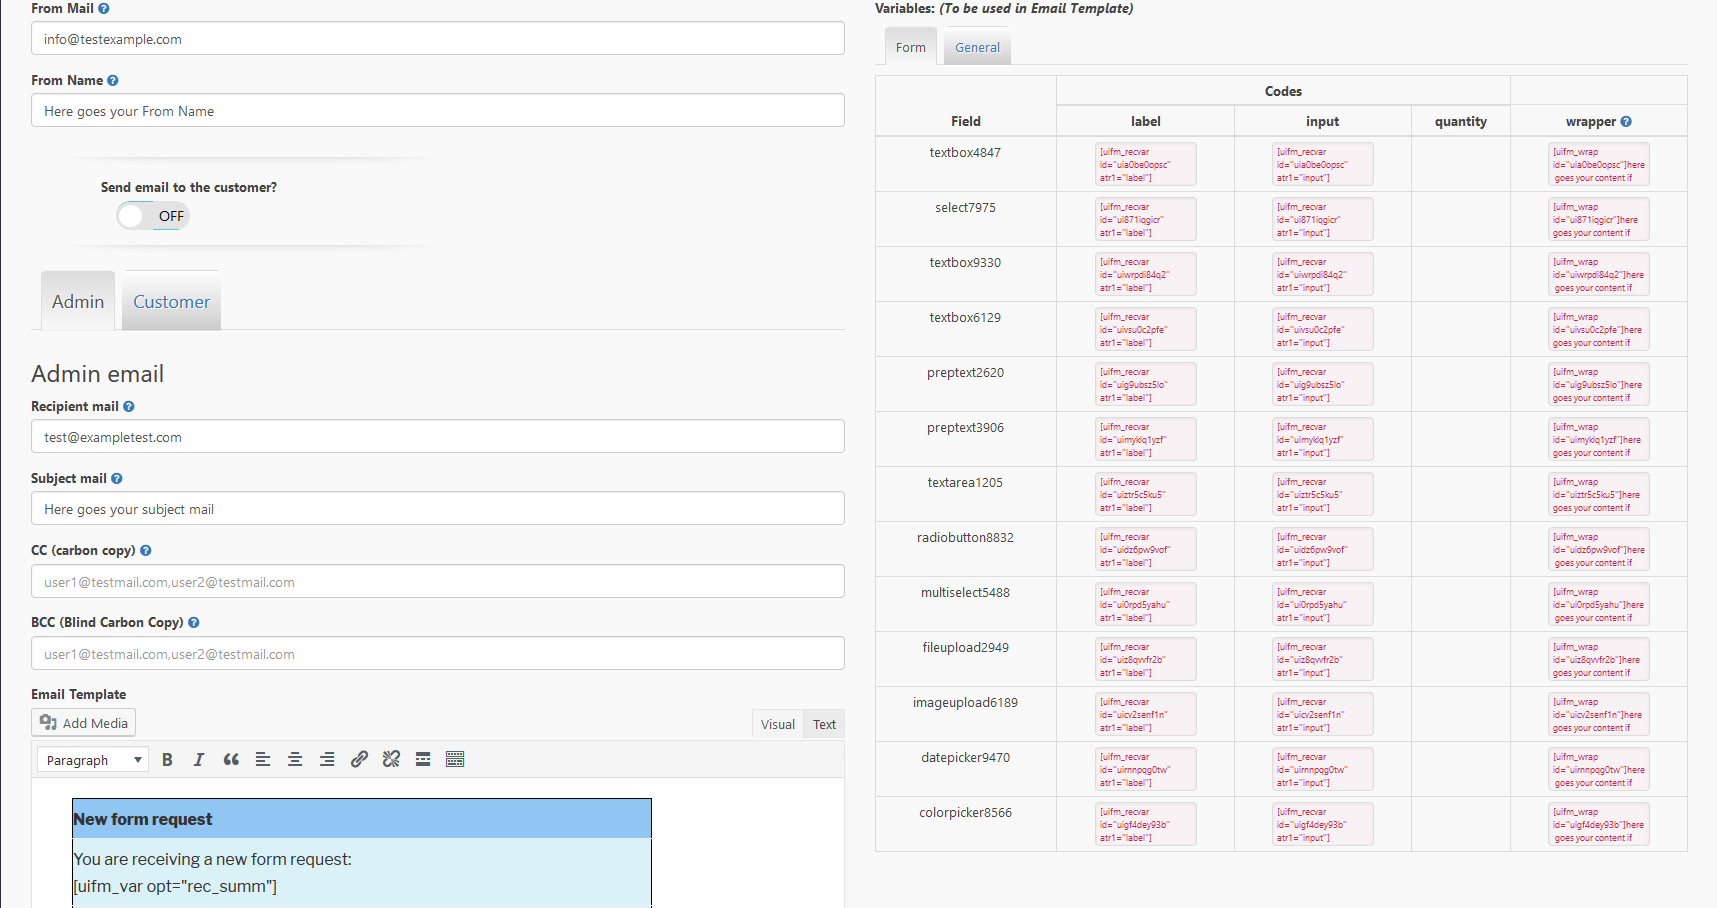
- Email settings: on this tab you can find all options in order to customize the email settings. you can add subject mail, recipient mail , customize your notificacion mail, add variables to content, enabled mail to customer, attach pdf and many other options.
- also you can enabled mail notification to customer.
- also you can enabled mail notification to customer.
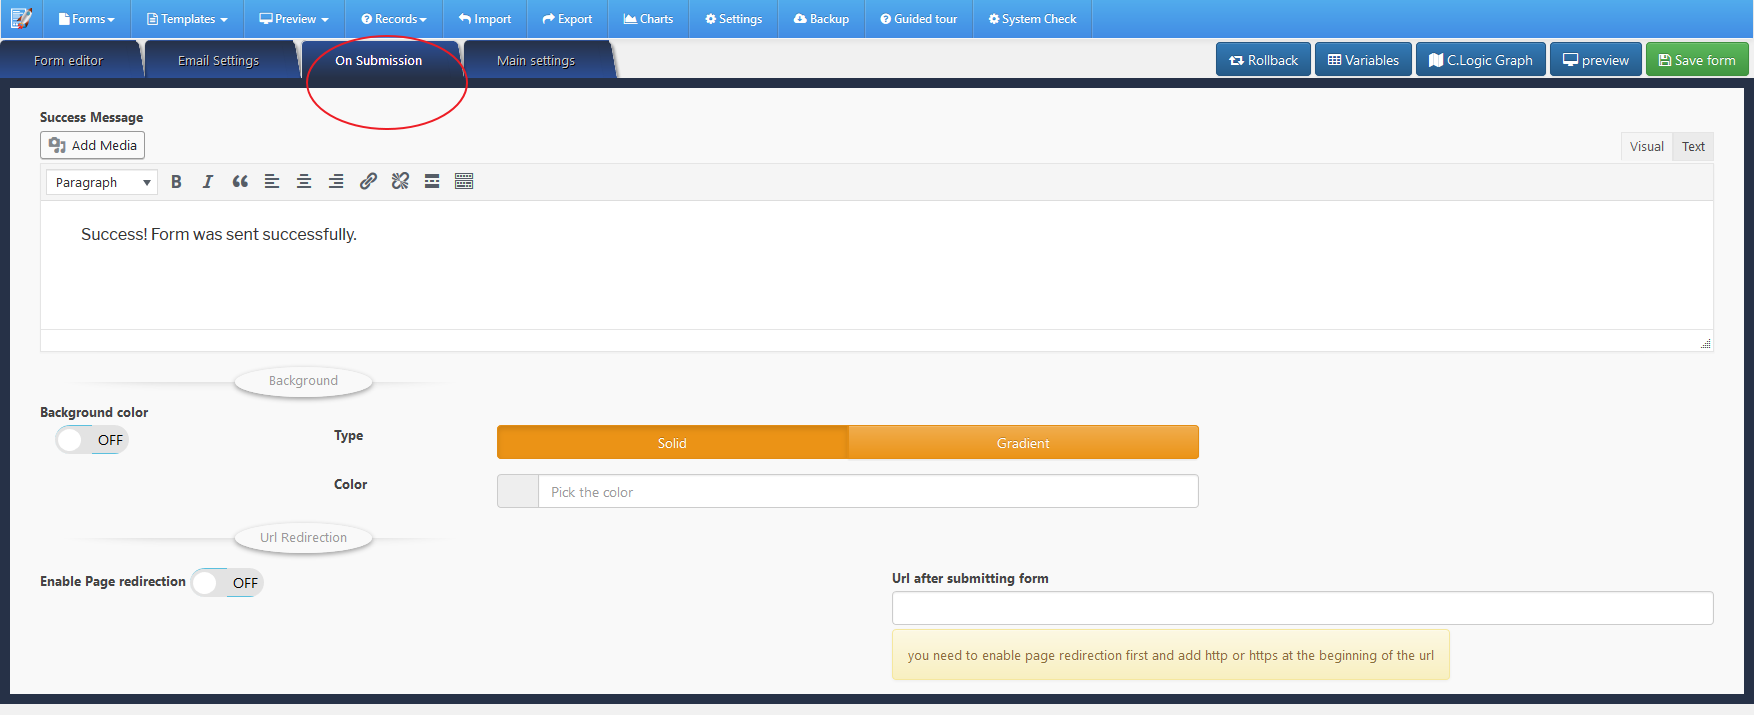
- Submission tab: on this tab you can change the success message. it support html and it brings other features like change background color. Also it offers page redirection after form is submitted. you can put any url site to redirect.
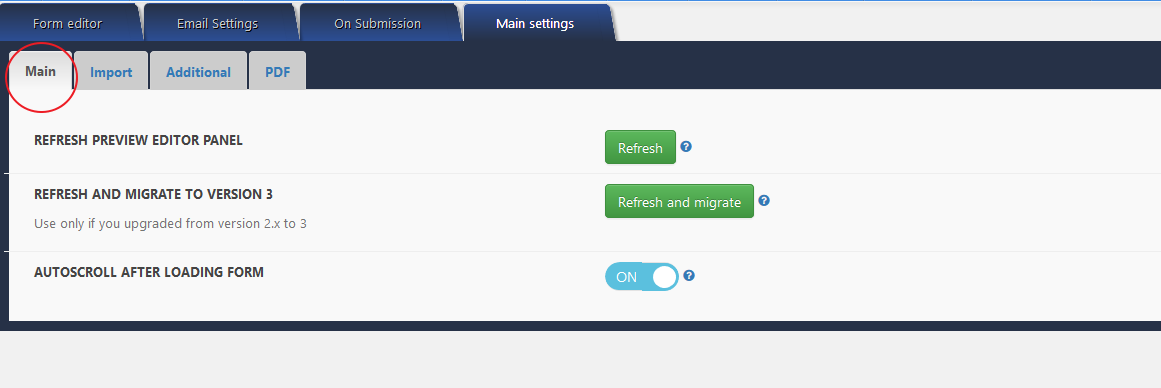
- Main settings tab: it offers many options too and they are ordered by tabs.
- Main tab: it offers options like:
- refresh: Refresh current form in order to clean and eliminate any kind of issue in the form
- refresh and migrate to version 3: this option is only for older versions
- autoscroll after loading form: you can enable and disable the autoscroll when the form is loaded.
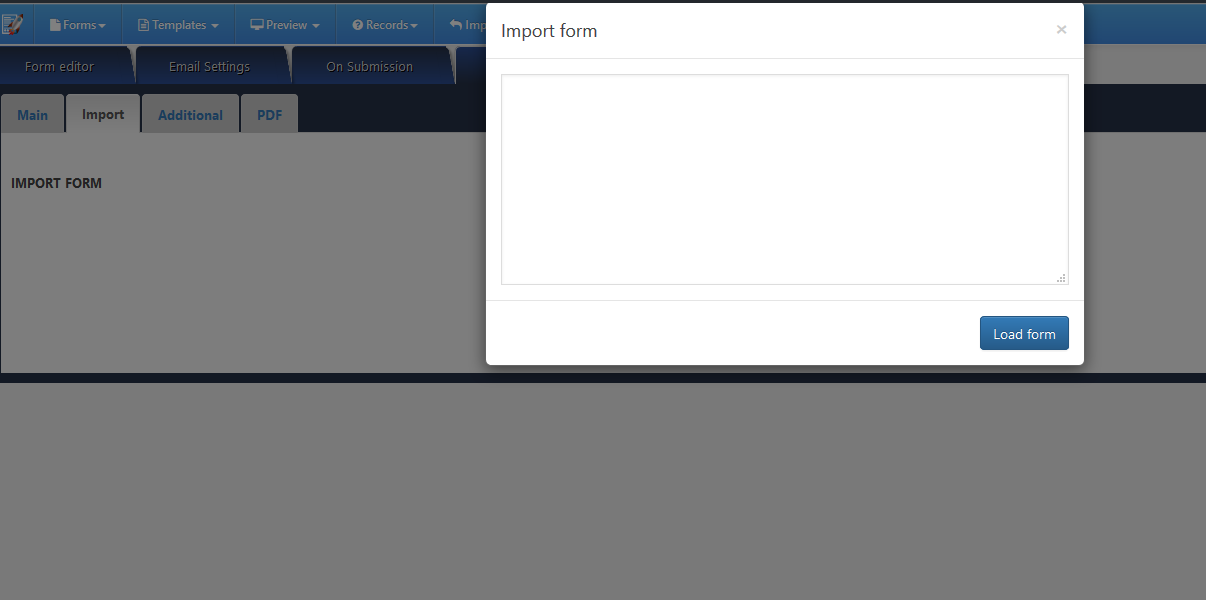
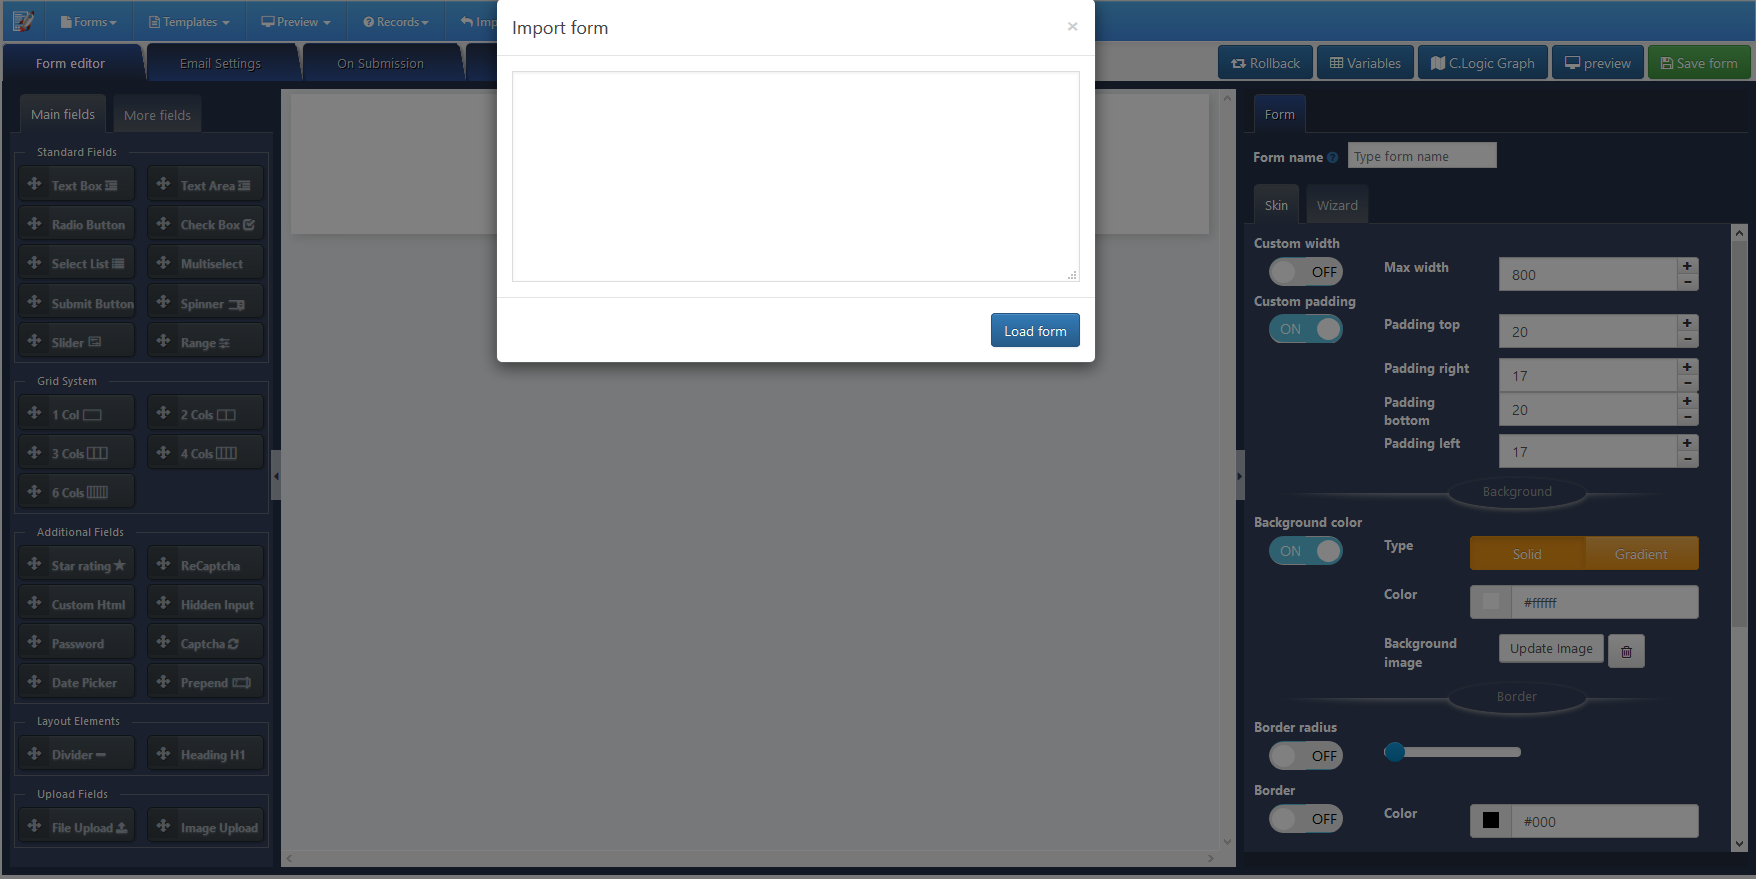
- Import: it offers the option to import a form. just press the button and pop up will appear asking to add the code to import:
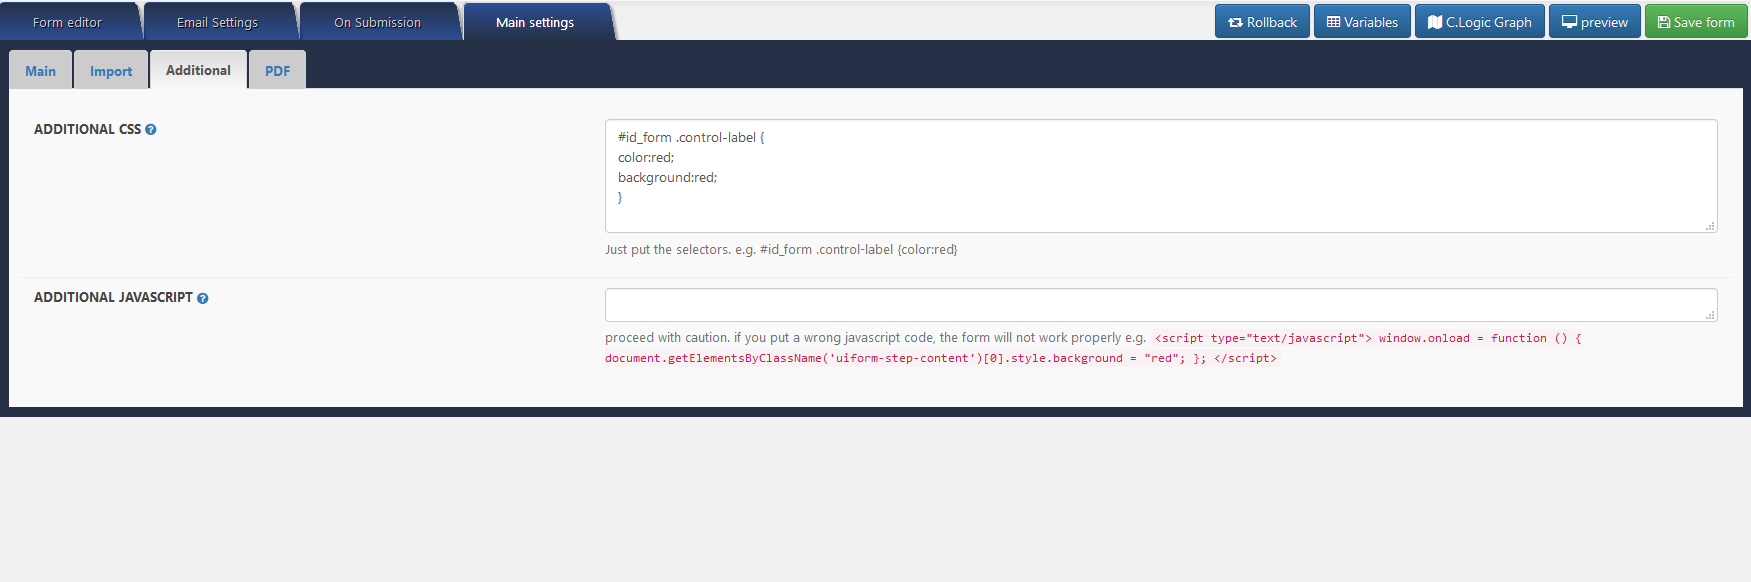
- Additional tab: it allows you to add custom css and custom javascript.
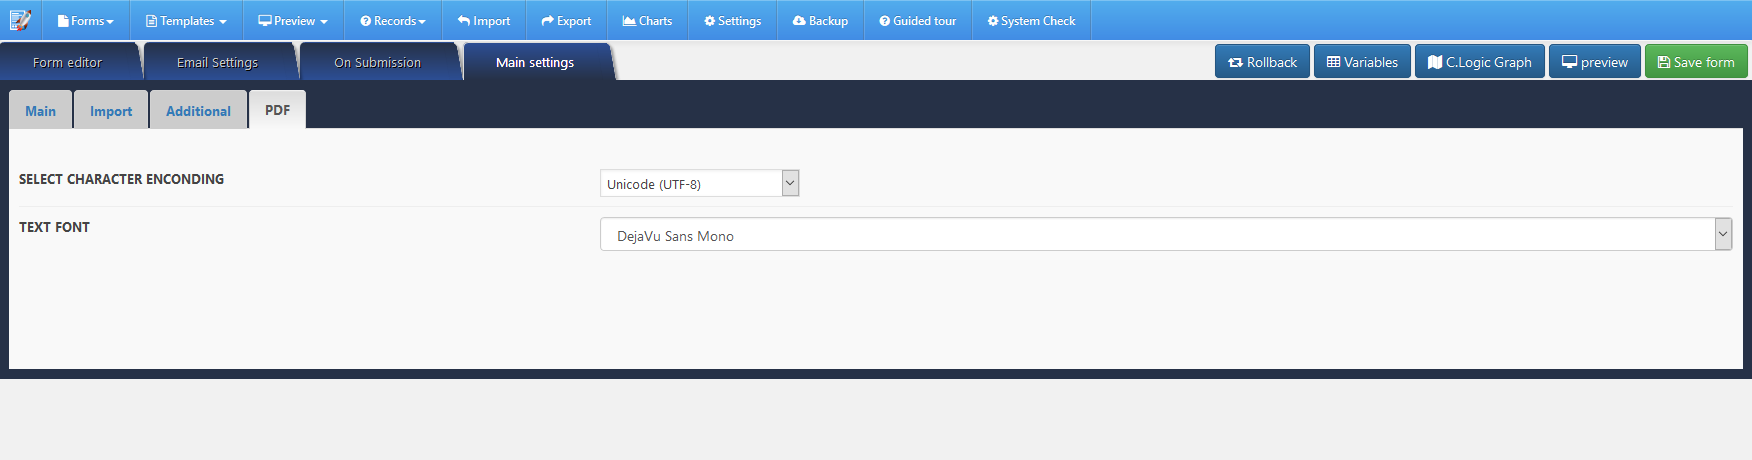
- PDF tab: it allows you to configurate the pdf settings for the form. you can choose the character encoding or text font:
- Main tab: it offers options like:
- when you create a new form or edit a form. you will see at the top, tab options: form editor, Email settings, On submission, and main settings.
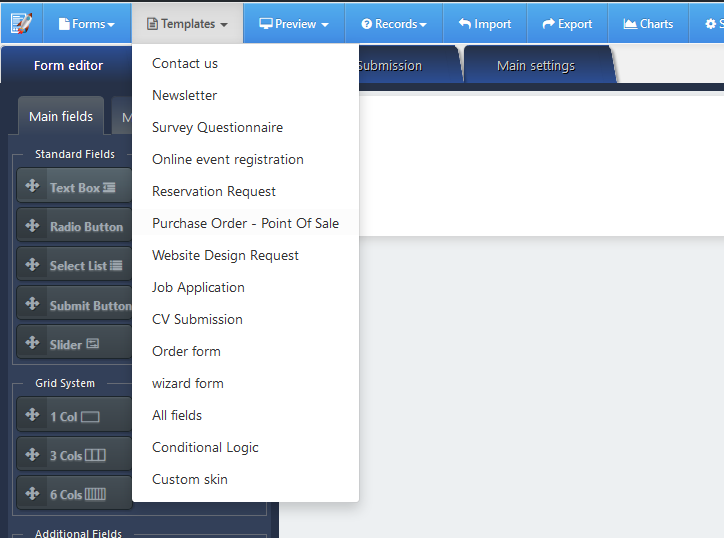
- Templates: it offers templates to load quickly and use it :
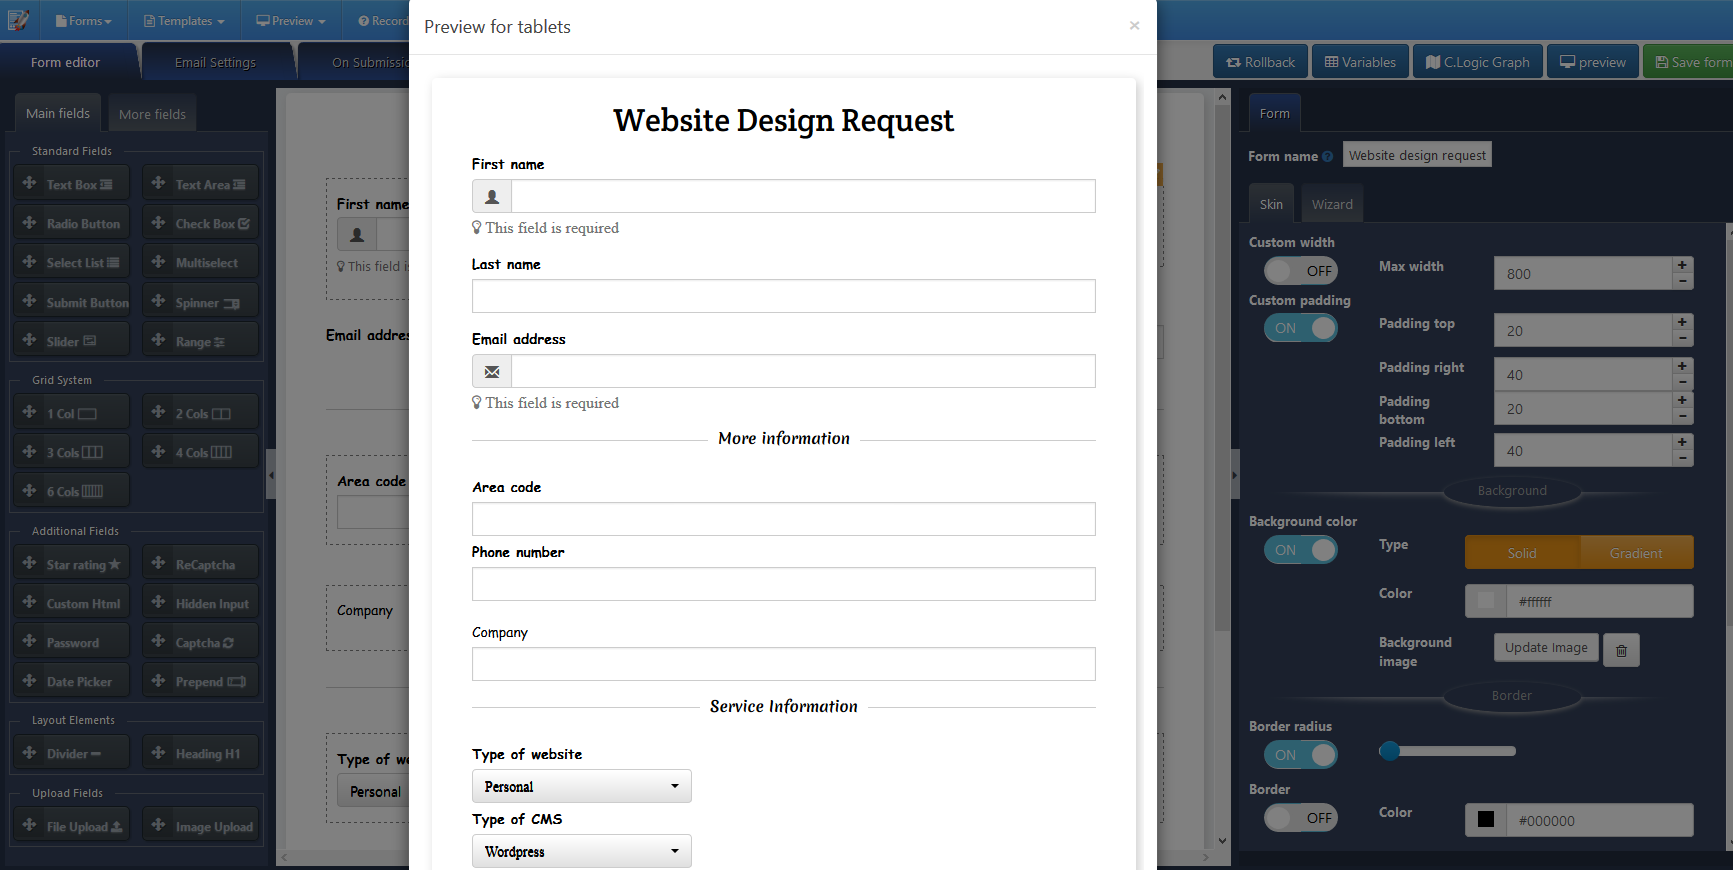
- Preview: it offers the option to preview for tables, smartphone or desktops
- Records: you can find all related to records of the submitted forms. you can see the next options:
- List all forms: it lists all forms no matter what form.
- Filter Records: it lists with detailed information and it can be filtered by form:
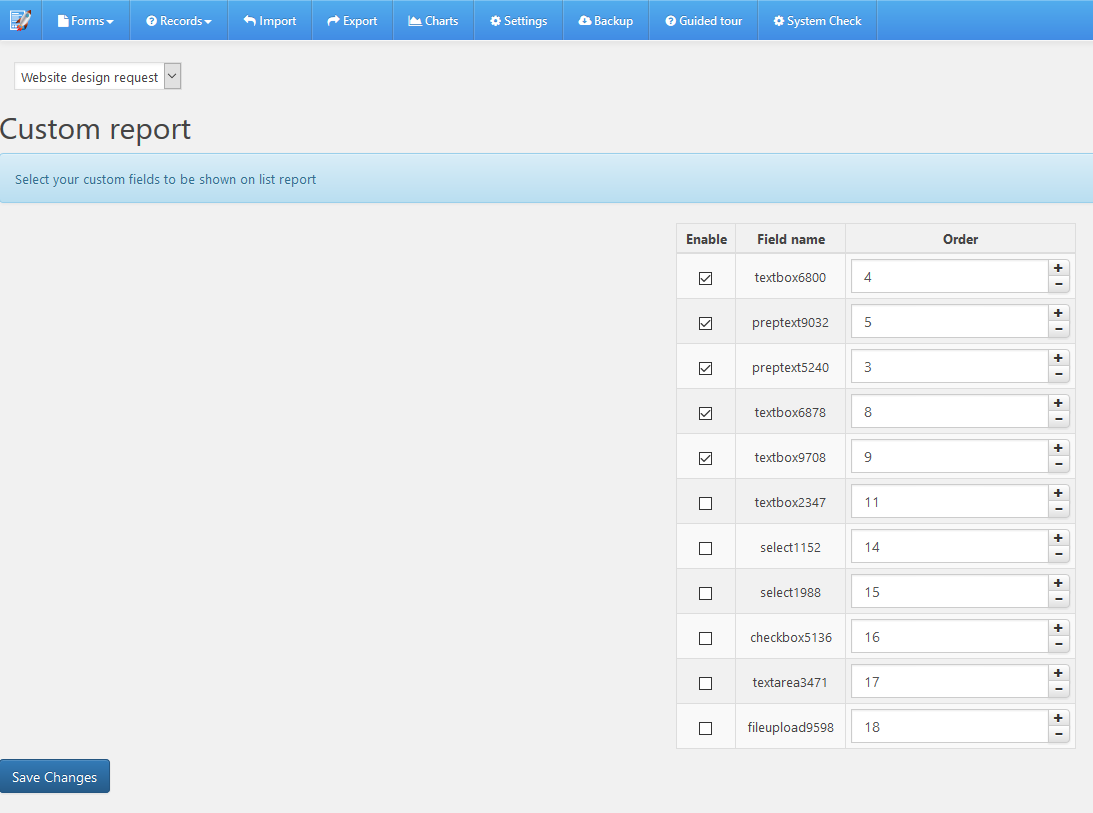
- Custom report: it offers the option to customize what fields to shows in the list and set the order:
- List all forms: it lists all forms no matter what form.
- Import: it offers the option to import the form, just paste the code and press “load form” button
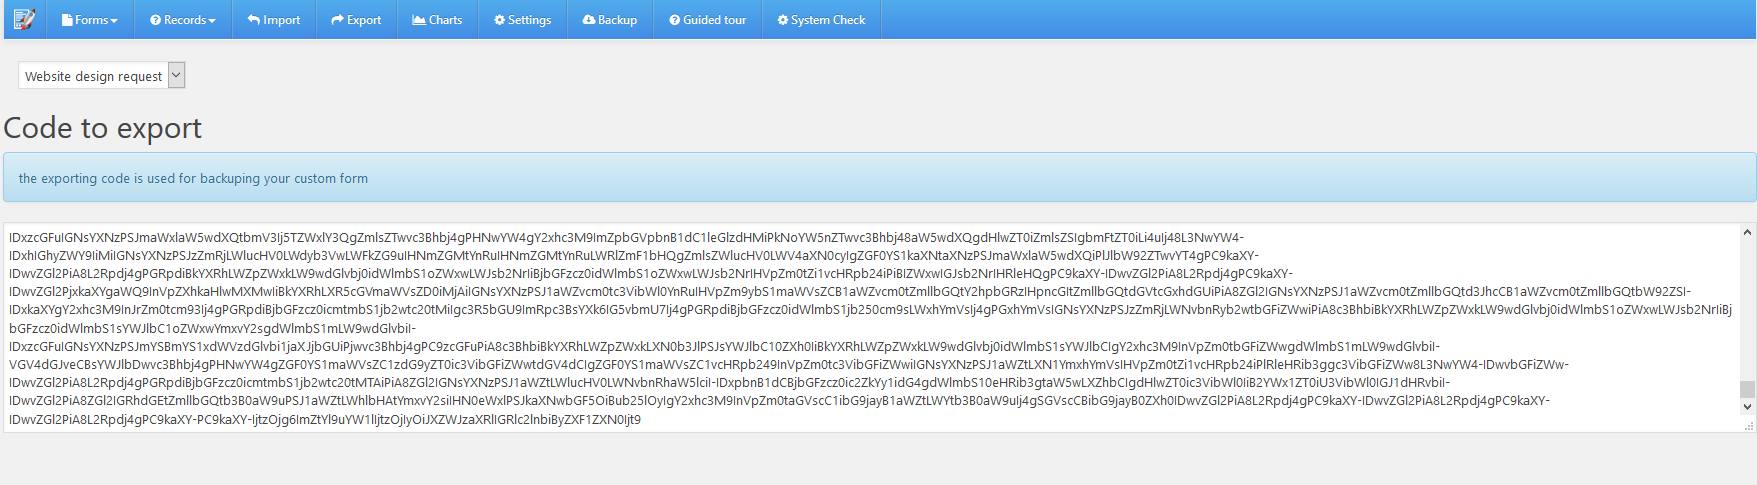
- Export: it offers the option to expor the form
- Charts: it offers the chart of submitted forms. it is filtered by form.
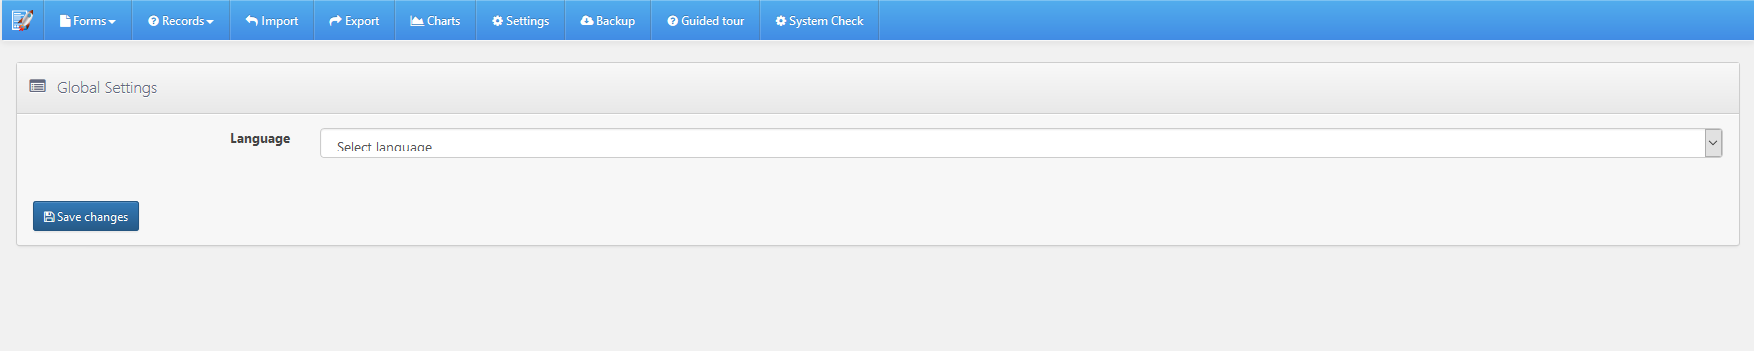
- Settings: it offers the option to change the language
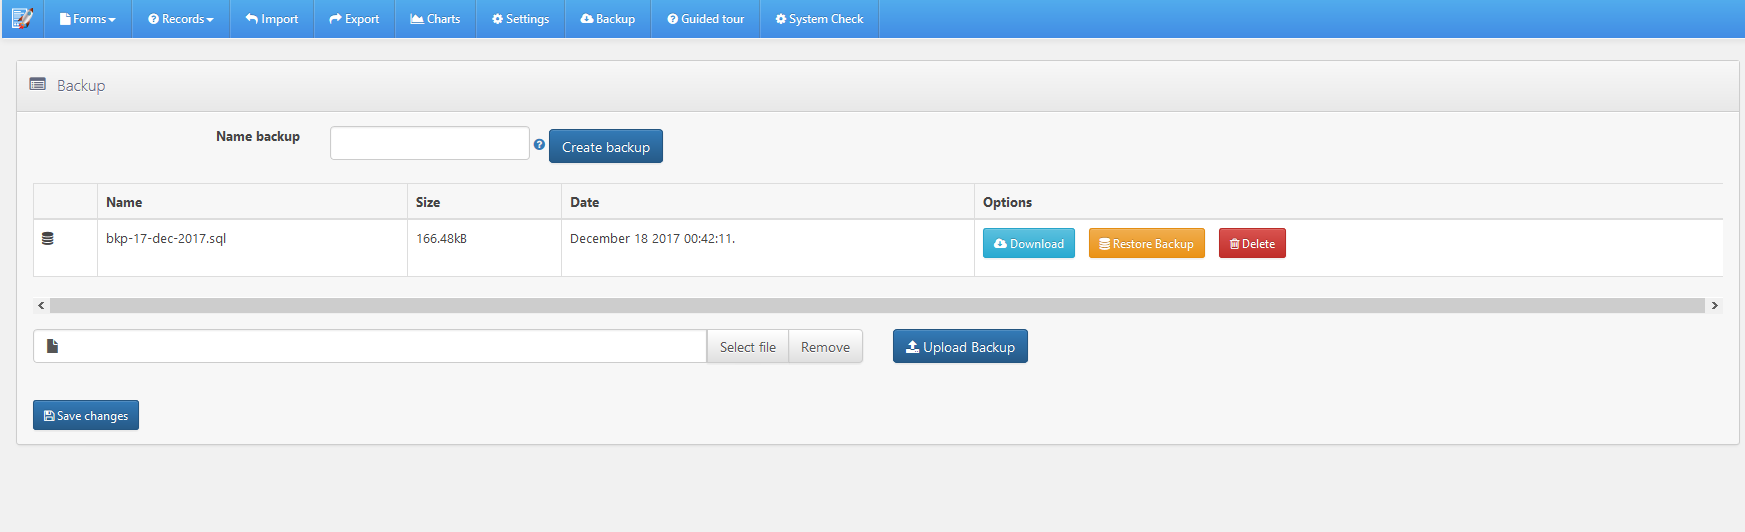
- Backup: it offers the option to backup your forms and all data of the plugin.
- Guided Tour: it option offers guided tour. but this is available on certain pages like panel edition
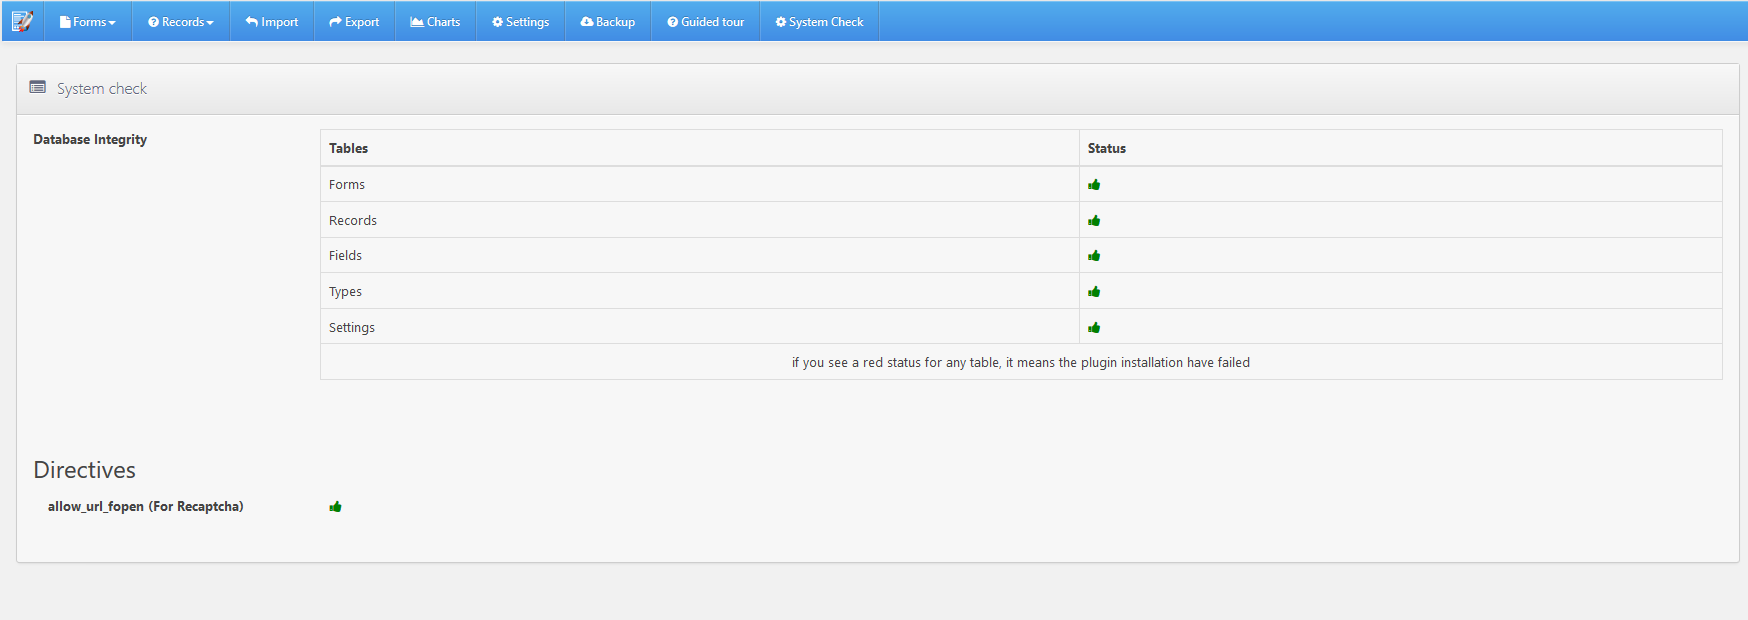
- System Check: it offers the option to check if the plugin was installed successfully or is missing some configuration
- Forms: this menu options offer the next option: create new form and list created forms


here the overview in video (reference):